Keeping your anti fatigue kitchen mats clean is easier than you think. With the right approach, you can remove grease, food stains, and odors in just a few simple steps. This guide covers how to clean anti fatigue kitchen mats using safe, effective methods for every mat type. You will learn quick daily tips and deep cleaning techniques that keep your kitchen floor mat fresh and hygienic all year round.
Key Takeaways
- Know your mat material: Rubber, foam, and vinyl mats each need different cleaning approaches for the best results.
- Clean regularly: Daily wiping and weekly deep cleaning prevent buildup and extend the life of your kitchen mat.
- Use gentle cleaners: Mild dish soap and warm water work great for most anti fatigue mats without causing damage.
- Avoid harsh chemicals: Bleach and strong solvents can break down the material and reduce the mat’s anti fatigue properties.
- Dry your mat completely: Proper drying prevents mold and mildew growth, keeping your kitchen hygiene at its best.
- Replace when needed: Even with great care, mats wear out over time and should be replaced when they lose their shape or cushioning.
📑 Table of Contents
Why Kitchen Mats Get So Dirty
Kitchen mats work hard every single day. They stand between your feet and a cold floor while you cook, clean, and prep meals. Over time, they collect all kinds of mess. Spills, crumbs, grease, and dirt build up fast. A dirty mat can also trap bacteria and create unpleasant odors. Understanding why your mat gets so dirty is the first step toward keeping it clean.
The kitchen is one of the most used rooms in any home. You are constantly moving around, cooking, and cleaning. Your kitchen floor mat absorbs everything that falls or spills during the process. Food particles, cooking grease, and water all seep into the material. This makes regular cleaning essential for maintaining proper kitchen hygiene.
Different mat materials attract different types of dirt. Rubber mats tend to collect grease and grime from cooking. Foam mats soak up liquids and food particles more easily. Vinyl mats show stains more prominently than other materials. Knowing what your mat is made of helps you choose the right cleaning method. It also helps you avoid damaging the material during the cleaning process.
How to Clean Anti Fatigue Kitchen Mats
The good news is that cleaning your mat is not complicated. You do not need fancy products or a lot of time. With a few basic supplies and some simple steps, you can make your mat look and smell like new. Here is how to clean anti fatigue kitchen mats based on their material type.
Cleaning Rubber Anti Fatigue Mats
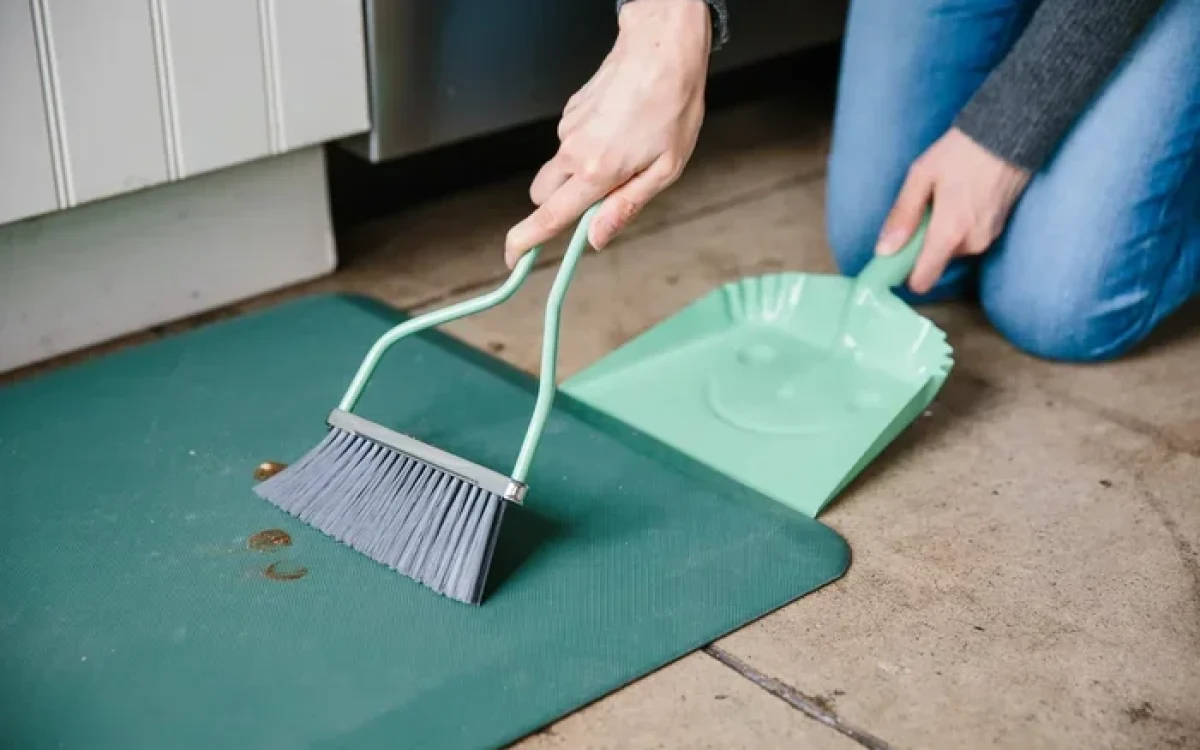
Rubber mats are the most popular type of anti fatigue kitchen mat. They are durable and designed to last. They also happen to be one of the easiest to clean. Start by taking the mat outside or placing it near a sink. Shake off any loose debris first. This removes crumbs, dust, and small food particles that sit on the surface.
Next, mix warm water with a few drops of mild dish soap. Use a soft brush or sponge to scrub the surface gently. Pay extra attention to greasy spots and stubborn stains. Grease buildup is the most common problem with rubber mats. A paste made from baking soda and water works wonders on tough grease stains. Apply it to the affected area and let it sit for 15 to 20 minutes. Then scrub and rinse thoroughly.
After washing, rinse the mat completely with clean water. Make sure no soap residue stays behind. Soap left on the mat can attract more dirt and create a sticky surface. Let the mat air dry completely before placing it back on the floor. Hanging it over a railing or clothesline works great for drying. Proper drying prevents mold and mildew from forming.
Quick Tips for Rubber Mat Cleaning:
- Use a soft bristle brush to avoid scratching the surface.
- For tough grease stains, add a small amount of baking soda to your soapy water.
- Never use a pressure washer on rubber mats. The force can damage the material.
- Hang the mat to dry if possible. This helps air circulate and prevents mold growth.
- Sprinkle baking soda on the mat overnight for natural mat deodorizing.
Cleaning Foam Kitchen Mats
Foam mats require a gentler approach than rubber mats. They absorb more water and can tear if handled roughly. Start by spot cleaning any fresh spills right away. Use a clean cloth dampened with warm, soapy water. Blot the stain gently. Do not rub hard or you may damage the foam structure beneath the surface.
For a deeper clean, fill a bathtub or large basin with warm water. Add a small amount of mild detergent. Submerge the foam mat and let it soak for about 15 minutes. The soaking loosens dirt and grime trapped inside the foam. Gently agitate the water to help clean the mat. Do not wring or twist the foam. This can cause it to lose its shape and cushioning over time.
Drain the soapy water and refill the basin with clean water. Rinse the mat several times until the water runs clear. Squeeze out excess water carefully. Lay the mat flat on a clean towel and press down gently to absorb moisture. Then let it air dry completely. Foam mats take longer to dry than rubber mats, so patience is key. Never place a foam mat in direct sunlight for long periods. The heat can cause the foam to break down and crumble.
Cleaning Vinyl and Silicone Mats
Vinyl and silicone mats are among the easiest to maintain. They resist water and do not absorb spills easily. This makes them ideal for busy kitchens where messes happen constantly. Simply wipe them down with a damp cloth and mild soap after each use. For stuck-on food or grease, use a non abrasive scrubber. Scrub gently and rinse with clean water.
These mats can also be washed in a bathtub with warm soapy water. The process is similar to cleaning rubber mats. The key is to avoid harsh chemicals. Strong solvents can cause vinyl and silicone to crack or discolor over time. Stick with gentle cleaners and your mat will stay looking great for years. This simple approach to vinyl mat care keeps your mat safe and effective.
Deep Cleaning Methods for Kitchen Mats
Sometimes regular cleaning is not enough. Your mat may have deep stains, stubborn odors, or heavy buildup from weeks of use. In those cases, a deep clean is necessary. Here are some proven methods for a deep clean kitchen mat that really works.
| Method | Best For | Difficulty | Time Needed |
|---|---|---|---|
| Vinegar and Water Solution | Odors and light stains | Easy | 30 minutes |
| Baking Soda Paste | Stubborn grease stains | Medium | 1 hour |
| Hydrogen Peroxide Clean | Deep stains and sanitizing | Medium | 45 minutes |
| Dishwasher Wash | Small rubber mats only | Easy | 1 hour (cycle) |
| Outdoor Power Wash | Heavy dirt and grime | Hard | 20 minutes |
Vinegar and Water Solution
White vinegar is a natural cleaner that works wonders on kitchen mats. It cuts through grease and kills bacteria at the same time. Mix equal parts water and white vinegar in a spray bottle. Spray the solution generously over the entire mat. Let it sit for 10 to 15 minutes. The vinegar will break down grease and neutralize odors. Scrub the surface with a soft brush. Rinse thoroughly with clean water. This method is excellent for mat deodorizing and freshening up your kitchen floor covering.
Baking Soda Paste
For tough grease stains that refuse to budge, baking soda paste is your best friend. Mix three parts baking soda with one part water to form a thick paste. Spread the paste over the stained area. Let it sit for at least 30 minutes. The baking soda will absorb the grease and lift the stain from the mat fibers. Scrub gently with a soft brush. Rinse well with warm water. This method works especially well on rubber and vinyl mats. It is one of the most effective grease removal mat techniques you can try at home.
Hydrogen Peroxide Clean
Hydrogen peroxide is a mild bleach alternative. It sanitizes and whitens without the harsh effects of chlorine bleach. Mix one part hydrogen peroxide with two parts water. Apply it to stained areas of your kitchen mat. Let it sit for 15 minutes. Scrub gently with a soft brush. Rinse thoroughly with clean water. This is a great option for kitchen mat stain removal and kitchen mat sanitizing. Always test a small hidden area first to make sure the mat color does not fade.
Dishwasher Wash
Some rubber kitchen mats are dishwasher safe. This is one of the easiest ways to wash rubber mats without much effort. Check the manufacturer label before trying this method. Place the mat on the top rack of your dishwasher. Use a gentle cycle with mild detergent. Avoid heated dry settings. High heat can warp the mat and reduce its lifespan. Let the mat air dry completely after the cycle ends. This method is perfect for busy homeowners who want a quick and effective clean.
Expert Insight: Many homeowners do not realize that their dishwasher can handle kitchen mats. It saves time and ensures a thorough clean. Just make sure the mat fits properly on the top rack and that it is made of dishwasher safe material. Always check the care instructions from the manufacturer before putting your mat in the dishwasher.
Quick Tips for Everyday Mat Care
Keeping your mat clean does not have to be a big chore. A few simple habits can make a huge difference. These tips will help you maintain your kitchen mat with minimal effort every single day.
- Wipe up spills immediately. The longer a spill sits, the harder it is to clean. Grease and food dyes can set into the mat if left too long.
- Shake or beat the mat outside once a week. This removes loose crumbs, dust, and small debris that accumulate daily.
- Spray the mat with a vinegar solution after heavy cooking days. This prevents grease from building up over time.
- Place a towel underneath the mat to catch excess moisture. This protects both the mat and your kitchen floor.
- Rotate your mat every few weeks. This helps it wear evenly and last longer.
- Use a lint roller for quick cleanup of hair and small debris. It is a fast and effective way to keep the surface clean.
These small habits keep your standing mat cleaning routine simple and effective. They also extend the life of your kitchen floor mat significantly. Consistency is the key to effortless kitchen mat maintenance. A little effort each day saves you from big cleaning jobs later.
Common Mistakes to Avoid
Even with good intentions, people often make mistakes when cleaning their mats. These errors can shorten the life of your mat or even damage it permanently. Here are some common mistakes to watch out for.
- Using harsh chemicals: Strong cleaners like bleach and ammonia can damage the mat material. They strip away the anti fatigue properties and can cause discoloration. Stick to mild, gentle cleaners for the best results.
- Skipping the rinse: Soap residue left on the mat can attract more dirt. It can also make the surface sticky and uncomfortable to stand on. Always rinse thoroughly after washing.
- Not drying the mat properly: A wet mat is a breeding ground for mold and mildew. Always let it dry completely before using it again. This is especially important for foam mats that retain more moisture.
- Using a stiff brush: Hard bristles can scratch and tear the mat surface. Use a soft brush or cloth instead. Gentle cleaning preserves the mat’s texture and cushioning.
- Ignoring the manufacturer instructions: Every mat is different. Always check the care label before cleaning. Some mats may have specific cleaning requirements that differ from general guidelines.
- Washing in hot water: Hot water can warp rubber and foam mats. It can also cause vinyl to buckle. Always use warm or cool water instead.
Avoiding these mistakes keeps your mat in great shape for years to come. Proper care ensures your non slip kitchen mat continues to provide comfort and safety every time you step into the kitchen.
When to Replace Your Anti Fatigue Mat
No matter how well you care for it, every mat has a lifespan. Knowing when to replace it is just as important as knowing how to clean it. A worn out mat loses its effectiveness and can even become a safety hazard in your kitchen.
Here are the signs your mat needs replacing:
- The mat has permanent stains that do not come out after deep cleaning.
- The cushioning feels flat and no longer provides comfort.
- The surface is cracking, peeling, or tearing in multiple places.
- The mat has a persistent odor even after thorough cleaning and deodorizing.
- The edges are curling or the mat has lost its original shape.
- You notice mold or mildew that will not go away no matter what you try.
A worn out mat loses its anti slip properties too. This can create a real safety hazard in your kitchen. When your kitchen safety mat starts to break down, it is time for a replacement. Investing in a new mat ensures your kitchen stays clean, safe, and comfortable for years to come.
Conclusion
Taking care of your anti fatigue kitchen mats does not have to be complicated. With the right cleaning methods and a little regular maintenance, your mat can stay fresh and functional for a long time. Whether you have a rubber mat, foam mat, or vinyl mat, the tips in this guide will help you get great results.
Remember to clean up spills quickly, do a deep clean regularly, and avoid common cleaning mistakes. Your kitchen floor mat works hard for you every single day. Give it the care it deserves. Now that you know how to clean anti fatigue kitchen mats the right way, you can keep your kitchen looking and feeling its best. A clean mat means a cleaner, safer, and more comfortable kitchen for you and your family. Start today and feel the difference in your kitchen.
Frequently Asked Questions
Can I put my anti fatigue kitchen mat in the washing machine?
It depends on the material of your mat. Most rubber and vinyl mats should not go in the washing machine because the agitator can damage them. Foam mats are also not machine washable in most cases. Always check the manufacturer’s care label first. The safest method is to hand wash your mat in a bathtub or sink with mild soap and warm water.
How often should I deep clean my kitchen mat?
You should deep clean your anti fatigue kitchen mat at least once every two weeks. If you cook frequently or have a busy household, weekly deep cleaning is better. Regular deep cleaning prevents grease buildup, removes odors, and keeps your kitchen hygiene at a high level. Between deep cleans, spot clean spills and wipe down the mat daily.
What is the best cleaner for kitchen mats?
Mild dish soap and warm water is the best all-around cleaner for most kitchen mats. For stubborn stains, a baking soda paste or white vinegar solution works great. Avoid using bleach, ammonia, or harsh chemical cleaners. These can damage the mat material and reduce its anti fatigue and anti slip properties over time.
How do I get rid of odors from my kitchen mat?
Odors usually come from trapped grease and food particles. Start by cleaning the mat with a vinegar and water solution. Sprinkle baking soda on the mat and let it sit overnight. The baking soda will absorb odors naturally. Make sure the mat dries completely before placing it back on the floor. Proper drying is key to preventing future odors.
Can I use bleach on my anti fatigue kitchen mat?
It is best to avoid bleach on anti fatigue kitchen mats. Bleach can break down rubber, foam, and vinyl materials over time. It can also strip away the cushioning that makes the mat comfortable. Stick with gentle cleaners like mild dish soap, vinegar, or baking soda. These are safe and effective for all mat types.
How long does an anti fatigue kitchen mat last?
With proper care and regular cleaning, most anti fatigue kitchen mats last between two and five years. The lifespan depends on the material, how often you use the mat, and how well you maintain it. Replace your mat when you notice permanent stains, loss of cushioning, cracking, or persistent odors that do not go away after cleaning.