There’s something magical about pumpkin and peanut butter together especially when chocolate is involved! These Pumpkin Peanut Butter Cups are the perfect mix of sweet, cozy, and creamy. They’re super simple to make and taste like little bites of fall. Whether you’re making them for Halloween, Thanksgiving, or just because it’s hard to eat just one!
Method
Melt the Chocolate
To start, add 1½ cups of dark chocolate chips and 1 heaping tablespoon of coconut oil into a microwave-safe bowl. Place the bowl in the microwave and heat it in 30-second increments, stirring well after each round. This helps prevent the chocolate from burning and ensures it melts evenly. Keep repeating the process until the chocolate is completely smooth and silky. The coconut oil helps the chocolate stay glossy and easier to pour.
Make the Chocolate Shells
Once the chocolate is melted, get your muffin liners ready either in a muffin tin or laid out on a tray. Spoon a small amount of melted chocolate into the bottom of each liner, just enough to cover the base. Then, using the back of the spoon, gently rotate or swirl the chocolate around the sides of the liner to coat the bottom and sides. This will create a little chocolate “cup” to hold the pumpkin filling. When you’re done coating all the liners, place them into the freezer for about 10 minutes. This allows the chocolate to harden and hold its shape.
Mix the Filling
While your chocolate shells are chilling in the freezer, it’s time to make the creamy, spiced pumpkin filling. In a mixing bowl, combine ½ cup of pumpkin purée, ½ cup of smooth peanut butter, 1 teaspoon of vanilla extract, 2 tablespoons of honey, 1 teaspoon of pumpkin pie spice, and ½ teaspoon of cinnamon powder. Stir everything together until the mixture becomes smooth, thick, and evenly blended. The spices will give the filling that warm fall flavor, and the honey adds just the right touch of sweetness.
Add the Filling
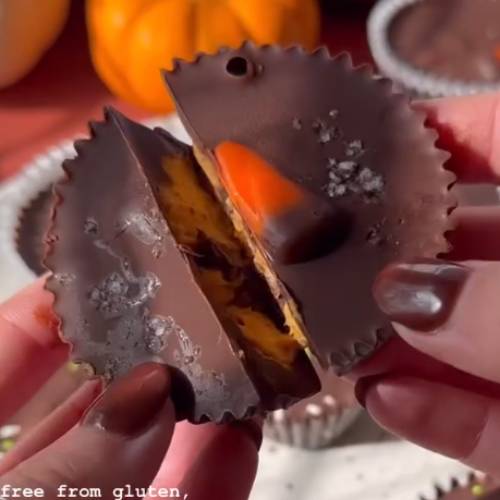
Take the muffin liners out of the freezer once the chocolate has hardened. Scoop about 1 tablespoon of the pumpkin mixture into each chocolate shell. Use the back of your spoon (or a spatula, if you prefer) to gently press and flatten the filling so it sits evenly inside each cup. This helps create a smooth surface for the top layer of chocolate to cover it later.
Cover with More Chocolate
Now it’s time to seal the deal! Spoon more of the melted chocolate over the pumpkin mixture in each liner. Make sure you pour enough to fully cover the filling and reach the edges of the chocolate shell. This creates a delicious chocolate lid and locks all that pumpkin goodness inside. If your chocolate has thickened, just pop it back in the microwave for a few seconds to loosen it up again.
Decorate & Freeze
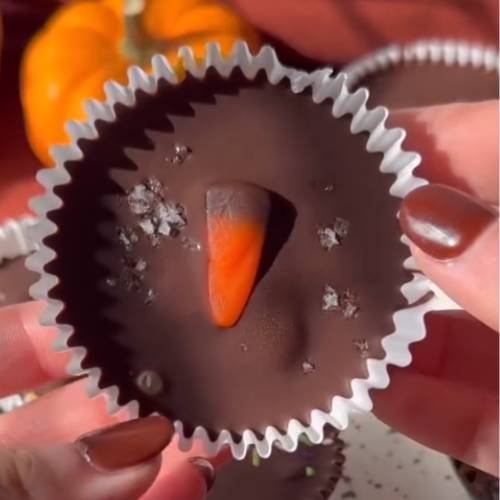
Before freezing, you can have some fun decorating the tops! Sprinkle a pinch of coarse sea salt for a sweet-salty combo, add colorful fall sprinkles for a festive look, or press in a piece of candy corn to make it extra seasonal. Once decorated, place the cups back in the freezer for at least 1 hour so they can fully set. After that, they’re ready to enjoy and they store great in the fridge or freezer!
Necessary Tools
- 12 muffin tins or muffin liners
- Microwave-safe bowl
- Spoon
- Mixing bowl
- Freezer space
- Spatula (optional, but helpful!)
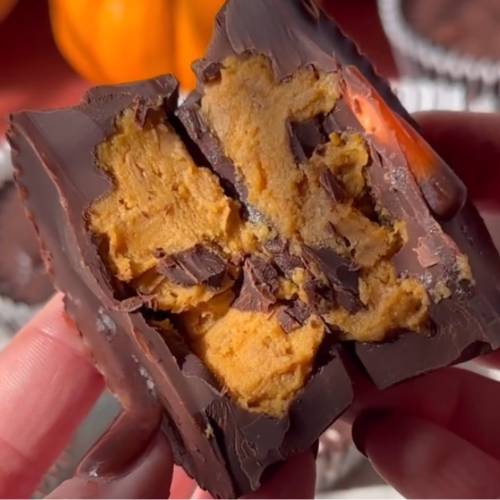
Pumpkin Peanut Butter Cups A Fall Treat You’ll Fall In Love With!
Cuisine: AmericanDifficulty: Easy12
servings15
minutes15
minutesIngredients
½ cup pumpkin purée
½ cup peanut butter (smooth works best!)
1 tsp vanilla extract
2 tbsp honey
1 tsp pumpkin pie spice
½ tsp ground cinnamon
1½ cups dark chocolate chips
1 heaping tbsp coconut oil
Optional toppings: coarse sea salt, sprinkles, or candy corn
Directions
- Step 1: Melt the Chocolate
Add your chocolate chips and coconut oil into a microwave-safe bowl. Heat in the microwave for 30 seconds at a time, stirring in between, until everything is melted and smooth. - Step 2: Make the Chocolate Shells
Spoon a bit of melted chocolate into each muffin liner. Use your spoon to swirl it around so the chocolate coats the bottom and sides. Pop them in the freezer for about 10 minutes to harden. - Step 3: Mix the Filling
In a separate bowl, mix the pumpkin purée, peanut butter, vanilla extract, honey, pumpkin pie spice, and cinnamon. Stir until it’s nice and smooth. - Step 4: Add the Filling
Take your muffin liners out of the freezer. Scoop a spoonful (about 1 tbsp) of the pumpkin mixture into each one. Flatten it down gently so it’s nice and even. - Step 5: Cover with More Chocolate
Pour more melted chocolate over each pumpkin-filled cup until the filling is completely covered. - Step 6: Decorate & Freeze
Add a little fun! Sprinkle sea salt, candy corn, or fall-themed sprinkles on top. Place the cups back into the freezer for at least 1 hour to fully harden.
Notes
- Don’t overheat your chocolate! Melting it too long can make it dry or lumpy.
- Make sure the first chocolate layer is totally hardened before adding the filling, or it’ll mix together.
- Press the pumpkin filling down evenly so the top layer of chocolate goes on smoothly.
- Work kind of fast when filling the cups chocolate hardens quickly once it starts cooling!

Serving Suggestions
- These are perfect as an after-school snack or dessert!
- Pair with a cozy mug of hot cocoa or warm apple cider.
- Want to get fancy? Serve on a fall-themed platter for parties!
Fun Fact
Did you know pumpkins are actually fruits? Yep! Even though we usually think of them as veggies, they grow from a flower and have seeds just like apples and melons.
Conclusion
These Pumpkin Peanut Butter Cups are a fun twist on a classic treat. They’re creamy, chocolatey, and full of fall flavor! I love how easy they are to make and how festive they look with just a few fun toppings. Trust me once you try one, you’ll want to make them all season long. Let me know in the comments if you make them and don’t forget to share your favorite topping ideas!