Our kitchen faucet replacement parts guide covers everything homeowners need to know about fixing leaky faucets, choosing the right components, and completing DIY repairs. You will learn how to identify your faucet type, find compatible parts like cartridges, O-rings, and aerators, and save hundreds on professional plumber costs. This guide includes practical tips, common mistakes to avoid, and expert insights for every skill level.
A dripping kitchen faucet is one of the most annoying sounds in any home. Not only does it drive you crazy, but it also wastes water and hikes up your utility bill. The good news is that fixing it is often simpler than you think. With the right kitchen faucet replacement parts, you can stop that drip in under an hour.
Whether you have a single-handle faucet or a classic double-handle setup, the principles of repair stay the same. You need to know what type of faucet you own, which part has failed, and where to find the right replacement. This guide walks you through every step of the process. You will learn about different faucet components, how to diagnose common problems, and exactly which parts to buy. By the end, you will feel confident tackling the repair yourself.
Many homeowners spend hundreds of dollars calling a plumber for what turns out to be a simple fix. A worn-out cartridge or a cracked O-ring does not require professional skills. It just requires the right information and a little patience. That is exactly what this guide provides. Let us dive into the world of sink faucet repair and get your kitchen back to working perfectly.
Key Takeaways
- Identify Your Faucet Type First: Single-handle, double-handle, and pull-down faucets all use different replacement parts. Matching the right component prevents leaks and ensures smooth operation.
- Common Parts Include Cartridges, O-Rings, Aerators, and Stems: Knowing what each part does helps you troubleshoot problems quickly and buy the correct replacement.
- DIY Replacement Saves Money: Most faucet repairs cost under $20 in parts and take under an hour. You do not need professional plumbing skills for many fixes.
- Brand and Model Matching Is Critical: Taking the old part to the store or noting the model number ensures a perfect fit every time.
- Regular Maintenance Prevents Costly Repairs: Cleaning aerators, replacing worn O-rings, and checking for leaks early extends the life of your plumbing fixtures significantly.
- Know When to Call a Pro: Some issues like cracked valve bodies or complex installation require a licensed plumber to avoid water damage.
📑 Table of Contents
- Understanding Your Kitchen Faucet Types
- Essential Kitchen Faucet Replacement Parts
- How to Find the Right Replacement Parts
- Step-by-Step Faucet Repair Guide
- Common Mistakes to Avoid
- When to Call a Professional Plumber
- Maintenance Tips to Extend Faucet Life
- Cost Savings of DIY Faucet Repair
- Conclusion
Understanding Your Kitchen Faucet Types
Before you buy any kitchen faucet replacement parts, you need to know what kind of faucet you have. Different faucet designs use different internal mechanisms. Each mechanism has its own set of components that can wear out over time. Let us look at the most common types found in homes today.
Single-Handle Faucets
Single-handle faucets are the most popular style in modern kitchens. They use one lever or knob to control both water temperature and flow. Inside, they typically use one of three mechanisms: cartridge, ceramic disc, or ball-type valves.
The cartridge design uses a movable cylinder that slides up and down to control water flow. When the cartridge wears out, you get leaks or inconsistent water pressure. Faucet cartridges are among the most commonly replaced parts in kitchen plumbing fixtures. They are also one of the easiest to swap out.
Ceramic disc faucets use two ceramic plates that slide against each other. These are known for durability and long life. However, when they do fail, you need a specific ceramic disc valve replacement. Ball-type faucets use a rotating ball mechanism and are common in older single-handle designs from brands like Delta and Moen.
Double-Handle Faucets
Double-handle faucets have separate knobs for hot and cold water. They are often found in traditional or classic kitchen designs. Inside, they typically use compression stems or ceramic discs.
Compression faucets are the oldest design. They use rubber washers that press against a valve seat to stop water flow. Over time, these washers flatten and harden, causing leaks. Replacing a faucet stem and its washer is a straightforward repair. You just need to match the size and thread type of your original part.
Double-handle faucets also come in cartridge versions. In these, each handle controls a separate cartridge. When one side leaks, you only need to replace that side’s cartridge. This makes repairs quick and affordable.
Pull-Down and Pull-Out Sprayer Faucets
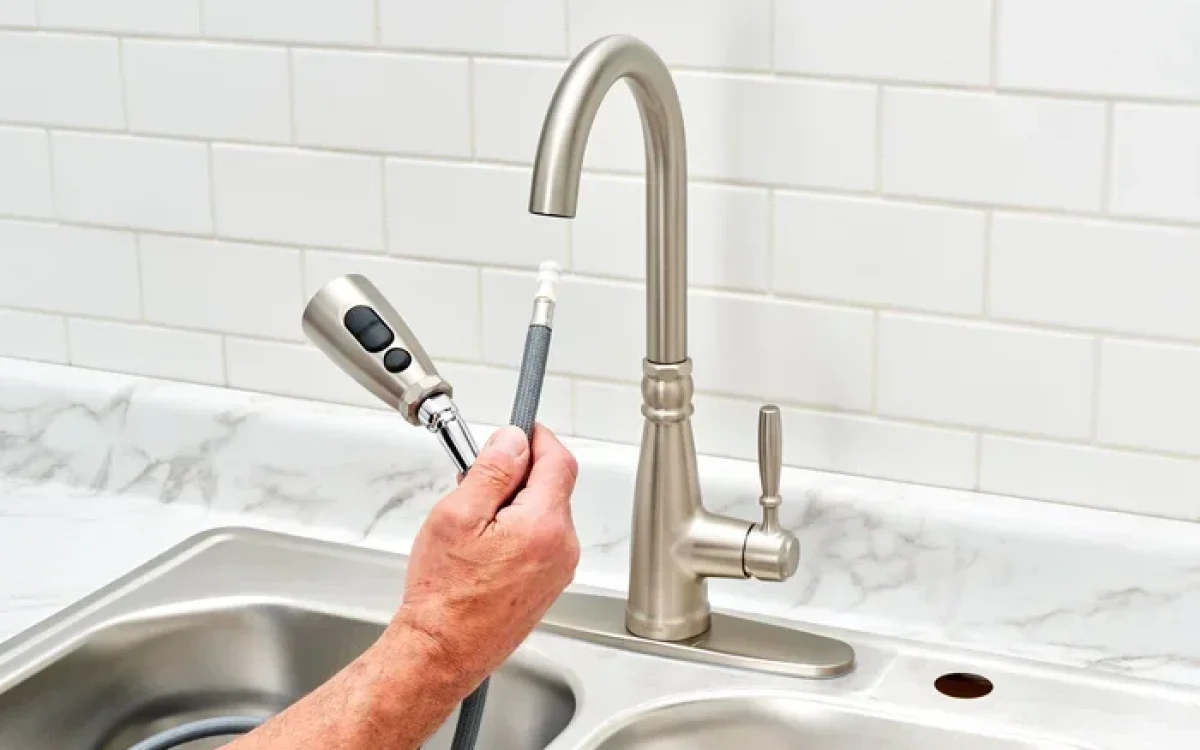
Pull-down sprayers are increasingly common in modern kitchens. They have a spray head that pulls down from the faucet spout. These faucets combine a regular faucet with a retractable spray hose.
The pull-down sprayer mechanism includes several additional parts that can fail. The spray head, hose, diverter valve, and connector clips are all potential points of failure. When your sprayer stops working, the issue is often a clogged nozzle or a worn-out diverter. Replacing these kitchen faucet replacement parts usually does not require replacing the entire faucet.
Essential Kitchen Faucet Replacement Parts
Now that you understand faucet types, let us look at the specific parts you might need. Each component plays a vital role in how your faucet functions. Knowing what they do helps you troubleshoot problems faster.
Faucet Cartridges
A cartridge is the heart of many modern faucets. It controls the flow and temperature of water by regulating how much water passes through. When a cartridge gets old or damaged, you will notice leaks around the handle or inconsistent water temperature.
Cartridges come in many shapes and sizes. Brands like Moen, Delta, Kohler, and Price Pfister all use proprietary designs. This means you cannot swap a Moen cartridge into a Delta faucet. Always take the old cartridge to the store or note the exact model number before purchasing faucet replacement parts.
Some cartridges are easy to remove with just your hands. Others need a special removal tool. Many hardware stores rent these tools for free. If you are unsure which cartridge you need, bring the old one with you. Most store employees can match it quickly.
O-Rings and Washers
O-rings and washers are small rubber or silicone components that create watertight seals inside your faucet. They are inexpensive but absolutely essential. When an O-ring deteriorates, water leaks from around the handle or base of the faucet.
O-rings come in various sizes. You need to match the exact diameter and thickness of the original part. Washers work similarly but are typically flat discs that sit at the end of a compression stem. Both parts are available at any hardware store for just a few dollars each.
Replacing O-rings and washers is one of the easiest DIY plumbing tasks. You simply remove the handle, pull out the stem, and slide off the old O-ring. Apply plumber’s grease to the new O-ring before installing it. This ensures a smooth seal and extends the part’s lifespan.
Faucet Aerators
An aerator is the small screen at the tip of your faucet spout. It mixes air with water to create a smooth, splash-free stream. Over time, aerators collect mineral deposits, sediment, and debris. This reduces water flow and can cause sputtering.
Cleaning or replacing your faucet aerator is one of the simplest maintenance tasks. You unscrew it by hand or with pliers wrapped in a cloth to prevent scratching. Soaking it in vinegar for 30 minutes often clears mineral buildup completely.
If the aerator is damaged beyond cleaning, replacement is easy. Aerators come in standard sizes and thread types. Male and female threads are the two main varieties. Make sure you buy the right one for your faucet spout. A new aerator costs just a few dollars and can dramatically improve water pressure.
Faucet Valves and Valve Seats
The valve is the internal mechanism that stops water flow when you turn off the faucet. In compression faucets, the valve seat is the surface the washer presses against. If the valve seat gets corroded or pitted, water will leak even with a new washer installed.
Valve seats can be replaced with a simple seat wrench tool. You unscrew the old seat and thread in a new one. This is a common fix for double-handle faucets that continue to leak after washer replacement. Brass fittings and valve seats are widely available and very durable.
Some modern faucets use ceramic valves instead of traditional compression mechanisms. These valves rarely need replacement but can crack if debris enters the system. When a ceramic valve fails, you typically replace the entire cartridge assembly rather than just the valve component.
Diverter Valves and Sprayer Components
Faucets with pull-down sprayers use a diverter valve to switch water between the spout and the spray head. When the diverter fails, water may leak from the spray head when you are using the spout, or flow from both simultaneously.
The diverter valve is usually located inside the faucet body or at the base of the spray hose. Replacing it involves removing the faucet handle and pulling out the old diverter. New diverter valves are available as standalone parts or as part of a complete faucet repair kit.
The spray hose itself can also develop leaks or kinks over time. If your sprayer has low pressure or spurts unevenly, the hose may be clogged with mineral buildup. Soaking the hose end in vinegar can often clear the blockage. If the hose is damaged, full replacement is straightforward and affordable.
How to Find the Right Replacement Parts
Finding compatible kitchen faucet replacement parts can feel overwhelming with so many brands and models on the market. But it does not have to be. A few simple steps will get you the right part every time.
Check Your Faucet Brand and Model
Most faucets have a brand name and model number stamped on the base or under the handle. Look for this information before shopping. The model number tells you exactly which parts are compatible with your faucet.
If you cannot find the model number, take a photo of the faucet and visit your local hardware store. Bring the photo and ask a staff member to help you match the parts. Many stores have cross-reference guides that make this process quick and easy.
Bring the Old Part With You
This is the golden rule of faucet repair. Before you remove any part, take a photo with your phone. Then carefully remove it and bring it to the store. Matching the exact shape, size, and threading of the old part guarantees a perfect fit.
Do not try to guess the size or assume parts are universal. Even parts from the same brand can vary between product lines. Taking the old part eliminates guesswork and saves you the frustration of buying the wrong component.
Buy from Reputable Sources
Purchase plumbing fixtures and replacement parts from trusted retailers. Online marketplaces offer a wide selection, but make sure you are buying from verified sellers. Counterfeit or low-quality parts may fit poorly and fail quickly.
Brand-name parts from the faucet manufacturer are always the safest choice. They are designed specifically for your faucet model and come with warranties. Aftermarket parts can work well too, but stick with reputable brands to ensure quality and compatibility.
Step-by-Step Faucet Repair Guide
Once you have your kitchen faucet replacement parts, it is time to do the repair. Follow these steps for a smooth and successful fix.
Step 1: Turn Off the Water Supply
Before you start any repair, locate the shut-off valves under your sink. Turn both the hot and cold valves clockwise to close them. Open the faucet to release any remaining water pressure. This prevents water from spraying everywhere when you disassemble the faucet.
Step 2: Remove the Handle
Use a screwdriver or Allen wrench to remove the screw holding the handle in place. Carefully pull the handle off. Some handles have decorative caps that pop off to reveal the screw underneath. Set the screw and handle aside in a safe place.
Step 3: Extract the Faulty Part
Depending on your faucet type, you will need to remove a cartridge, stem, or ball assembly. Use the appropriate tool for your specific model. If parts are stuck, a little penetrating oil can help loosen them. Work slowly to avoid damaging the faucet body.
Step 4: Install the New Part
Place the new component in the same position as the old one. Make sure O-rings and washers are properly seated before reassembly. Apply plumber’s grease to rubber components for smoother operation and better sealing.
Step 5: Reassemble and Test
Put the handle back on and tighten the screw. Turn the water supply back on and test the faucet. Check for leaks around the handle, spout, and base. Run both hot and cold water to ensure proper temperature control and flow.
If everything looks good, you are done. You just saved yourself a plumber visit and learned a valuable home maintenance skill. Keep your old parts in a small bag under the sink for future reference.
Common Mistakes to Avoid
Even experienced DIYers make mistakes when replacing faucet parts. Here are some pitfalls to watch out for.
- Buying the wrong part: Always verify compatibility before purchasing. A part that is even slightly the wrong size will not work properly.
- Over-tightening components: Tightening too much can crack the faucet body or strip threads. Hand-tighten plus a quarter turn with a wrench is usually sufficient.
- Forgetting to turn off the water: This leads to a flooded sink and a stressful repair experience. Always shut off the supply first.
- Using Teflon tape on the wrong connections: Teflon tape is great for threaded pipe connections but can interfere with cartridge seals if applied incorrectly.
- Ignoring mineral buildup: Sometimes the problem is not a worn part but hard water deposits. Clean all components thoroughly before assuming a part needs replacement.
- Mixing old and new parts: Replace all worn components at once. Installing a new washer on a corroded valve seat will lead to another leak soon.
When to Call a Professional Plumber
Most faucet repairs are well within the scope of a confident DIYer. However, some situations call for professional help. If you notice water pooling under your sink, the issue may involve deeper plumbing connections that require specialized tools.
A cracked faucet body cannot be repaired with simple part replacement. In this case, you need a full faucet replacement. A licensed plumber can install new plumbing fixtures properly and ensure there are no hidden leaks in your water lines.
Also, if your home has older galvanized pipes, the problem might not be the faucet at all. Corroded pipes can cause low water pressure and leaks that mimic faucet problems. A professional can diagnose the root cause and recommend the best solution.
Maintenance Tips to Extend Faucet Life
Regular maintenance keeps your faucet working smoothly and prevents unexpected repairs. A little effort goes a long way toward protecting your investment in quality plumbing fixtures.
- Clean the aerator monthly: Soak it in vinegar to remove mineral deposits and maintain strong water flow.
- Check for leaks regularly: Even a small drip wastes thousands of gallons per year. Catch leaks early before they cause water damage.
- Replace O-rings annually: Proactive replacement prevents the rubber from hardening and cracking. This simple step extends the life of your faucet significantly.
- Use gentle cleaning products: Harsh chemicals can damage chrome finishes and rubber seals. Stick to mild soap and water for routine cleaning.
- Operate handles gently: Forceful turning wears out internal components faster. Smooth, steady movements reduce strain on cartridges and stems.
Following these simple tips means your faucet will last for many years without major repairs. When issues do arise, you will be prepared with the knowledge and parts to fix them quickly.
Cost Savings of DIY Faucet Repair
One of the biggest benefits of learning about kitchen faucet replacement parts is the money you save. A professional plumber typically charges between $100 and $250 for a simple faucet repair. The actual parts needed usually cost between $5 and $30.
By doing the repair yourself, you keep the entire difference. Over time, handling minor repairs independently can save homeowners hundreds of dollars. You also gain the satisfaction of solving problems on your own and the confidence to tackle bigger projects in the future.
Keep a small supply of common faucet repair kit components under your sink. Having O-rings, washers, and an extra cartridge on hand means you can fix a leak the same day it starts. No waiting for a plumber or dealing with expensive emergency service calls.
Conclusion
Dealing with a leaky or malfunctioning faucet does not have to be stressful or expensive. With the right kitchen faucet replacement parts and a basic understanding of how your faucet works, most repairs take less than an hour. You now know how to identify your faucet type, find the correct components, and complete the repair step by step.
Remember to always turn off the water supply first, bring the old part when shopping, and replace all worn components at once. Regular maintenance like cleaning aerators and replacing O-rings keeps your faucet in top shape for years. These simple habits prevent problems before they start.
Whether you have a single-handle cartridge faucet, a classic double-handle compression model, or a modern pull-down sprayer, the principles of repair remain the same. Identify the failed part, find the right replacement, and follow proper installation steps. Your kitchen faucet will work like new again, and you will have saved money and learned a valuable home maintenance skill in the process.
Frequently Asked Questions
What are the most common kitchen faucet replacement parts?
The most common parts include cartridges, O-rings, washers, aerators, valve seats, and diverter valves. These components wear out over time due to regular use, mineral buildup, and natural degradation of rubber and ceramic materials.
How do I know which faucet replacement part I need?
Identify your faucet brand and model number first. Then remove the old part and bring it to a hardware store for matching. Taking a photo and noting the exact dimensions ensures you buy the correct kitchen faucet replacement parts for your specific faucet.
Can I replace a faucet cartridge myself?
Absolutely. Replacing a cartridge is one of the simplest DIY plumbing tasks. You need to turn off the water, remove the handle, pull out the old cartridge, and insert the new one. Most repairs take under 30 minutes with basic tools.
How much do kitchen faucet replacement parts cost?
Individual parts typically cost between $2 and $30 each. A complete faucet repair kit with multiple components usually runs $10 to $40. This is a fraction of what a plumber charges for a service call.
Why does my faucet keep leaking after replacing parts?
Leaks after replacement often mean the valve seat is damaged or the wrong part was installed. Inspect the valve seat for corrosion and ensure the replacement part matches your faucet model exactly. Sometimes mineral buildup inside the faucet body causes recurring issues.
How often should I replace kitchen faucet components?
There is no set schedule. Replace parts as needed when you notice leaks, low pressure, or difficulty adjusting temperature. Proactive maintenance like annual O-ring replacement and monthly aerator cleaning helps prevent sudden failures and extends the overall life of your sink faucet repair components.