Replacing a kitchen sink is easier than most homeowners think. This guide walks you through every step of how to replace kitchen sink without hiring a plumber. You will learn the tools, techniques, and tips needed for a successful kitchen sink replacement on your own.
Replacing a kitchen sink might sound like a job for a professional. But here is the truth: most homeowners can handle this project themselves. With the right tools and a little patience, you can complete a kitchen sink replacement in just a few hours. This guide will show you exactly how to replace kitchen sink step by step. No fancy plumbing degree required.
Whether your current sink is cracked, outdated, or just worn out, swapping it out is more manageable than you might expect. Thousands of DIYers tackle this project every weekend and succeed. You will save real money and gain confidence in your home repair skills. Let us walk through the entire process together.
Key Takeaways
- Save Money: Replacing a kitchen sink yourself can save hundreds of dollars in plumber fees.
- Simple Process: Most sink replacements follow a clear set of steps that anyone can learn.
- Right Tools Matter: Having the correct plumbing supplies makes the job much faster and smoother.
- Safety First: Always shut off the water supply before starting any work under the sink.
- Choose the Right Sink: Drop-in and undermount sinks each have different installation requirements.
- Seal Properly: Using plumber’s putty and silicone sealant prevents leaks and water damage.
- Take Your Time: Rushing the job leads to mistakes. Patience ensures a leak-free, professional result.
📑 Table of Contents
- Why Replace Your Kitchen Sink Yourself?
- Gathering Your Tools and Supplies
- Preparing for the Replacement
- Installing the New Kitchen Sink
- Common Mistakes to Avoid
- Quick Tips for a Smooth Installation
- When Should You Call a Plumber?
- Maintenance Tips for Your New Sink
- Cost Breakdown for DIY Kitchen Sink Replacement
- Final Thoughts
Why Replace Your Kitchen Sink Yourself?
Hiring a plumber to swap out a kitchen sink can cost anywhere from $200 to $500 or more. That is a lot of money for a task that does not require advanced skills. When you learn how to replace kitchen sink on your own, you keep that money in your pocket. Plus, you set the pace and work on your own schedule.
There is also a real sense of satisfaction. Completing a kitchen renovation project like this gives you pride. You know exactly what was done and how it was done. If any issue comes up later, you already understand the setup. Here are the main reasons to go the DIY route.
- Cost savings: Avoid paying labor fees that plumbers charge.
- Flexibility: Work whenever you want, not on someone else’s schedule.
- Learning experience: Build skills you can use on future home repairs.
- Control: You choose the materials, the timing, and the quality of work.
- Speed: Without scheduling appointments, you can finish the same day.
Gathering Your Tools and Supplies
Before you start, make sure you have everything you need. Being prepared saves time and prevents frustrating pauses mid-project. Having the right plumbing supplies on hand makes the whole DIY sink install go much smoother.
Essential Tools for Kitchen Sink Replacement
Here is a list of the basic tools you will need. Check them off before you begin so nothing slows you down.
- Basin wrench: This specialized tool reaches nuts in tight spaces under the sink.
- Adjustable wrench: Helps loosen and tighten various fittings.
- Plumber’s putty: Creates a watertight seal around the sink drain and faucet base.
- Silicone sealant: Provides extra waterproofing where the sink meets the countertop.
- Channel-lock pliers: Grip and turn pipes and fittings with ease.
- Screwdriver set: Both flathead and Phillips head for removing mounting clips and screws.
- Bucket and towels: Catch residual water and clean up spills.
- Teflon tape: Seals threaded pipe connections to prevent leaks.
Choosing the Right New Sink
Not all sinks are the same. Picking the right one for your kitchen matters. The two most common types are drop-in sink and undermount sink. Each has different installation steps.
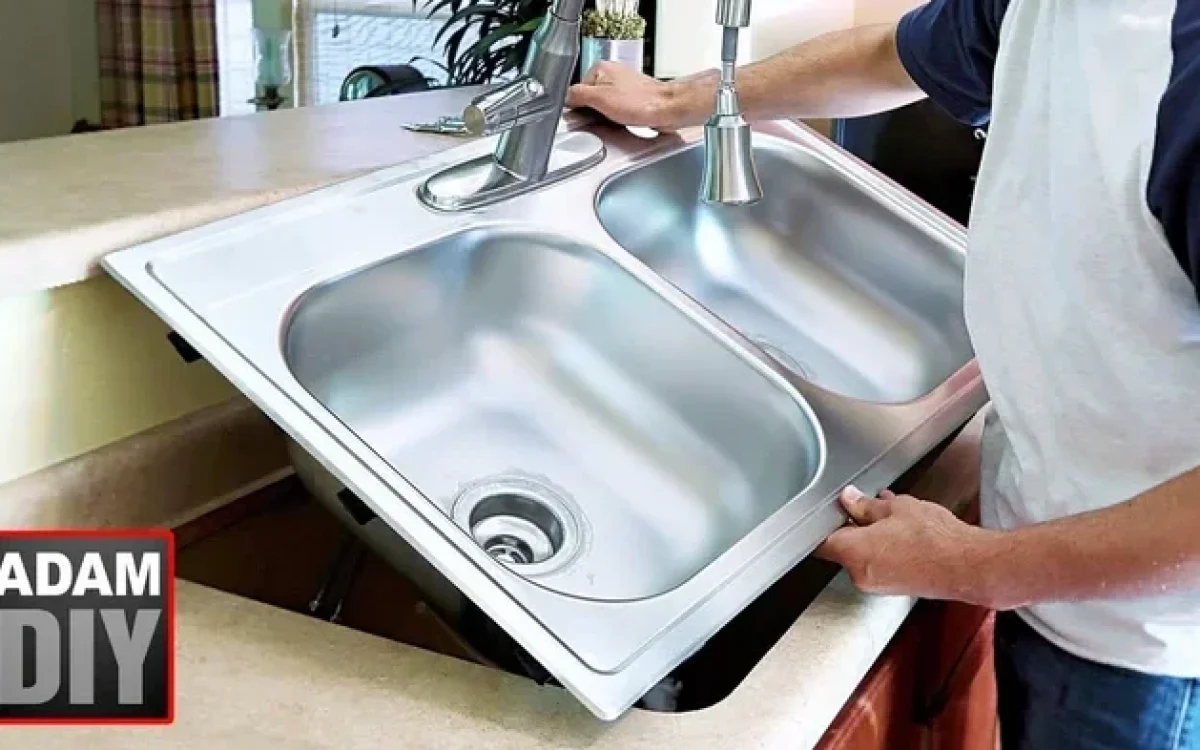
A drop-in sink sits on top of the countertop. It has a lip that rests against the sink cutout. These are the easiest to install for beginners. You just set it in place, seal it, and connect the plumbing. A countertop sink like this is forgiving and hard to mess up.
An undermount sink attaches underneath the countertop. It gives a sleek, seamless look. However, it requires more careful installation. You need to support the sink properly while securing it from below. If you are a first-timer, a drop-in sink is the safer choice.
Preparing for the Replacement
Preparation is the most important phase of any home repair project. Skipping steps here leads to problems later. Take your time and get everything ready before you touch a single pipe.
Step 1: Shut Off the Water Supply
First things first: turn off the water. Look under the sink for the shut-off valves. Turn them clockwise to close. If your home does not have individual shut-off valves, turn off the main water supply. This step is non-negotiable. Working on live pipes creates a huge mess and potential water damage.
After closing the valves, turn on the faucet to release any remaining water pressure. Let the lines drain completely. Place a bucket under the pipes to catch the last drops. Keep towels nearby for any spills. This simple step prevents unexpected water sprays while you work.
Step 2: Disconnect the Plumbing
Now it is time to disconnect the kitchen plumbing. Start with the supply lines. These are the small hoses that carry water to the faucet. Place your bucket underneath and use the adjustable wrench to loosen the connections. Have a towel ready for any water that drips out.
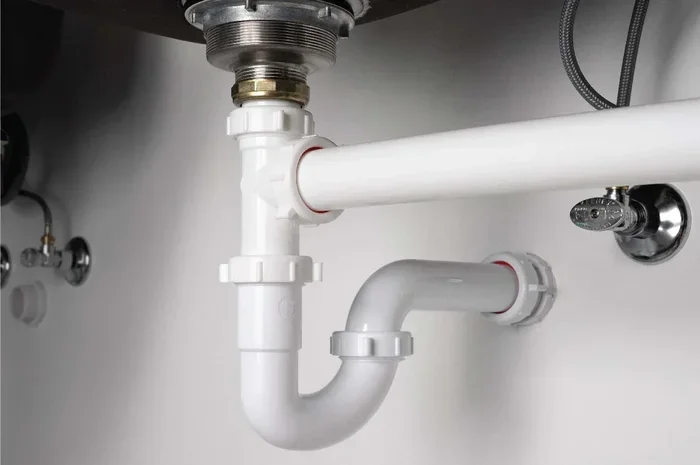
Next, disconnect the P-trap. This is the curved pipe under the sink that catches debris. Place the bucket directly below it. Loosen the nuts at both ends of the P-trap. The water inside will spill out, so be prepared. Remove the sink drain assembly from the bottom of the sink basin.
If you have a garbage disposal, you will need to disconnect that as well. Unplug it or turn off the circuit breaker first. Then disconnect the wiring and the drain hose. Set the disposal aside carefully. Some people keep their old disposal if it is still in good condition.
Step 3: Remove the Old Sink
With the plumbing disconnected, you can remove the old sink. Start by loosening the mounting clips or nuts that hold the sink in place. If you have a drop-in sink, look for clips under the countertop that secure the rim. Use your basin wrench to reach these nuts.
For an undermount sink, you will need to remove the mounting brackets from underneath. These are usually attached with screws or bolts. Once all fasteners are loose, carefully lift the sink out of the countertop opening. It helps to have a second person for this step. Old sinks can be surprisingly heavy.
Clean the countertop surface thoroughly before installing the new sink. Remove any old plumber’s putty, caulk, or debris. A clean surface ensures a proper seal with the new sink.
Installing the New Kitchen Sink
Now comes the rewarding part. You get to put in your new sink. Follow these steps carefully for the best results.
Step 4: Install the Sink Drain Assembly
Start from the bottom up. Apply a rope of plumber’s putty around the drain opening on the new sink. Roll the putty between your fingers to form a rope shape. Press it evenly around the edge of the drain flange.
Insert the drain assembly through the sink hole from above. Press it firmly into place. From underneath, attach the drain body and tighten the lock nut. Wipe away any excess putty that squeezes out. This creates a watertight seal that prevents leaks around the drain.
Step 5: Connect the Plumbing
Now connect the sink drain assembly to the P-trap. The P-trap connects to the drain tailpiece with a slip joint nut. Hand-tighten first, then snug it up with pliers. Do not over-tighten. This can crack the plastic fittings.
Connect the supply lines to the faucet. These hoses carry hot and cold water to the faucet base. Use Teflon tape on threaded connections to ensure a tight seal. Hand-tighten the nuts first, then give them a quarter turn with the wrench. Check every connection carefully.
If you are reinstalling a garbage disposal, connect the drain hose and the electrical wiring. Make sure all connections are secure. Run a quick test by turning on the disposal briefly. Listen for any unusual sounds that might indicate a problem.
Step 6: Mount the New Sink
For a drop-in sink, apply a bead of silicone sealant around the underside of the sink rim. Set the sink into the countertop opening from above. Press down firmly and make sure it sits evenly. Use the mounting clips to secure it from underneath. Tighten the clips snugly but do not overtighten.
For an undermount sink, apply sealant to the mounting bracket. Position the sink from below and align it with the countertop cutout. Secure it with the provided screws or brackets. Have a helper support the sink from above while you work underneath. Let the sealant cure according to the manufacturer’s instructions before using the sink.
Step 7: Reconnect the Water Supply
Once the sink is mounted and all plumbing is connected, it is time to turn the water back on. Slowly open the shut-off valves under the sink. Check every connection for leaks. Look at the supply line connections, the P-trap joints, and the drain assembly.
Run both the hot and cold water faucets. Let them run for a few minutes. Check underneath the sink for any drips or moisture. If you see a leak, tighten the connection slightly or reapply Teflon tape. A small leak left unchecked can cause big water damage over time.
Run the garbage disposal if you have one. Check the drain connection as well. Pour a bucket of water down the drain to test the flow. Everything should drain smoothly without any leaks.
Common Mistakes to Avoid
Even with careful planning, mistakes can happen. Knowing what to avoid saves you time and frustration. Here are the most common errors people make during kitchen sink replacement.
- Forgetting to shut off the water: This is the number one mistake. Always double-check that the valves are closed before disconnecting anything.
- Over-tightening connections: Cranking nuts too hard cracks plastic fittings and damages threads. Hand-tighten first, then a quarter turn with the wrench.
- Using the wrong sealant: Regular caulk is not the same as silicone sealant. Use the right product for waterproofing around the sink.
- Skipping the plumber’s putty: Going without putty around the drain almost guarantees a leak. It is a small step with big results.
- Buying the wrong sink size: Measure your countertop cutout carefully before purchasing a new sink. A too-large or too-small sink will not fit properly.
- Not checking for leaks immediately: Always test for leaks right away. Catching a small drip early prevents costly water damage later.
- Rushing the process: This is not a race. Take breaks, recheck your work, and move at a comfortable pace.
Quick Tips for a Smooth Installation
Here are some expert tips that make the job easier and faster. These come from experienced DIYers who have done this many times.
- Take photos before you start. Photograph all the connections under your old sink. These reference photos help you reconnect everything correctly.
- Keep a flashlight handy. The space under the sink is dark. A good flashlight helps you see every connection clearly.
- Use a helper for the heavy lift. New sinks can weigh 20 pounds or more. A second pair of hands makes installation safer and easier.
- Let silicone cure fully. Wait at least 24 hours before using the sink after applying sealant. This ensures a strong, waterproof bond.
- Keep spare parts on hand. Extra washers, nuts, and supply lines are cheap insurance against unexpected issues.
- Clean as you go. Wipe up excess putty and sealant immediately. It is much harder to clean once it dries.
When Should You Call a Plumber?
DIY is great, but knowing your limits is important. Most kitchen sink replacement projects go smoothly for homeowners with basic tool skills. However, some situations call for professional help.
If you discover significant corrosion on your pipes, call a plumber. Old galvanized pipes may need replacement beyond just the sink. If your kitchen plumbing involves complex configurations or unusual pipe materials, a professional can handle it safely. Also, if you have a garbage disposal that requires electrical rewiring, it is best to let a licensed electrician handle that part.
Water damage is another reason to call in the experts. If your countertop shows signs of water damage or swelling, you may need more than a new sink. A plumber can assess the full extent of the damage and recommend the right fix. Do not hesitate to call a professional when the situation goes beyond a straightforward swap.
Maintenance Tips for Your New Sink
Your new sink will last longer with proper care. Simple maintenance habits protect your investment and keep everything working beautifully.
- Clean regularly: Wipe down the sink after each use. Use mild soap and warm water for daily cleaning.
- Avoid harsh chemicals: Strong cleaners can damage the sink finish over time. Stick to gentle, non-abrasive cleaners.
- Check connections periodically: Every few months, look under the sink for any signs of moisture or drips.
- Use a sink mat: A rubber mat protects the bottom of the sink from scratches and dents caused by dishes.
- Run the garbage disposal properly: Always run cold water while using the disposal. Avoid putting grease, bones, or fibrous vegetables down the drain.
- Replace washers when needed: Worn washers cause leaks. Swap them out as soon as you notice dripping.
Cost Breakdown for DIY Kitchen Sink Replacement
One of the biggest advantages of doing this yourself is the cost savings. Here is a quick breakdown of what you can expect to spend.
| Item | Estimated Cost |
|---|---|
| Drop-in sink | $50 – $200 |
| Undermount sink | $100 – $400 |
| Plumber’s putty | $5 – $10 |
| Silicone sealant | $5 – $12 |
| Teflon tape | $2 – $5 |
| Supply lines (if needed) | $10 – $25 |
| P-trap assembly | $5 – $15 |
| Basin wrench (tool) | $15 – $30 |
| Plumber fees (if hired) | $200 – $500 |
As you can see, the total cost for a DIY kitchen sink replacement can be as low as $100 to $200 for most projects. Compare that to $200-$500 or more for professional labor alone. The savings are real and significant.
Final Thoughts
Learning how to replace kitchen sink is one of the most rewarding home improvement projects you can tackle. It combines practical skills with visible results. Every time you wash dishes or prepare food, you will feel the pride of a job well done.
The process is straightforward when you follow the steps carefully. Shut off the water, disconnect the old plumbing, remove the old sink, install the new one, and reconnect everything. It really is that simple. With the right tools, a little patience, and this guide, you can complete the entire kitchen sink replacement without calling a plumber.
Start with confidence. Gather your tools, choose the right sink, and take it one step at a time. You will be surprised at what you can accomplish. Good luck with your project, and enjoy your newly installed kitchen sink!
Frequently Asked Questions
How long does it take to replace a kitchen sink?
Most DIYers finish the job in two to four hours. The actual time depends on the type of sink and your experience level. A simple drop-in sink installation goes faster than a complex undermount sink setup.
Do I need any special plumbing knowledge to replace a kitchen sink?
No special knowledge is required. Basic familiarity with plumbing supplies like wrenches and P-traps is helpful. This guide walks you through every step in plain language. If you can tighten a nut and wipe up water, you can handle this project.
Can I reuse my old garbage disposal when replacing the sink?
Yes, you can reuse your old garbage disposal if it is still in working condition. Simply disconnect it from the old sink, clean it up, and reconnect it to the new sink following the manufacturer’s instructions. If it is more than ten years old, consider replacing it for better efficiency.
What type of sink is easiest for beginners to install?
A drop-in sink is the easiest option for beginners. It sits on top of the countertop and is held in place with clips and sealant. Undermount sinks require more precision and are better suited for experienced DIYers. Start with a drop-in sink for your first project.
How do I know if my new sink will fit my countertop?
Measure the cutout in your countertop carefully before purchasing a new sink. Measure both the length and width of the opening. Compare these measurements to the sink dimensions. Most sinks list the required cutout size in the product specifications. Always double-check to avoid buying the wrong size.
What should I do if I find a leak after installation?
Do not panic. Most leaks come from loose connections. Tighten the fitting slightly with a wrench. If the leak persists, disassemble the connection, apply fresh Teflon tape, and reconnect. Check the plumber’s putty seal around the drain as well. Dried or insufficient putty is a common cause of leaks.