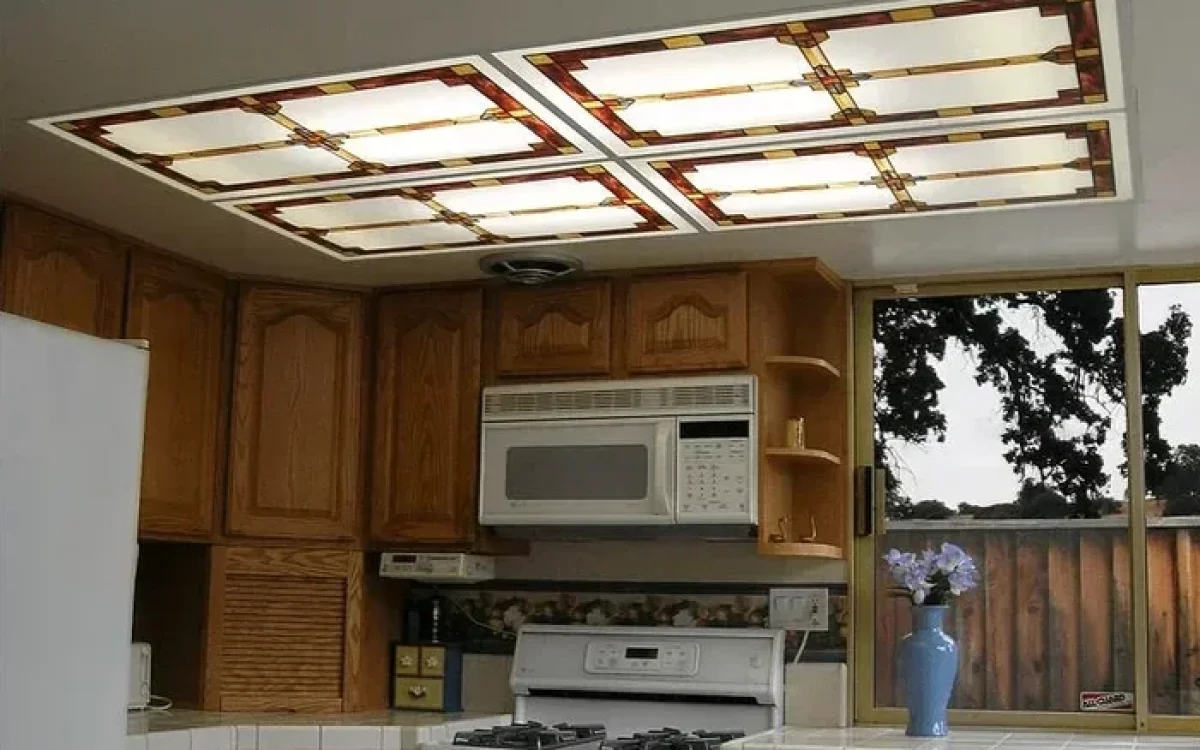
Removing a fluorescent light cover in your kitchen is a simple DIY task that anyone can do with basic tools and a little patience. This guide walks you through every step, from gathering the right supplies to safely reinstalling the cover. You will learn how to handle different cover types, avoid common mistakes, and keep your kitchen lighting looking great.
Every homeowner faces small maintenance tasks that seem harder than they really are. Removing a fluorescent light cover in the kitchen is one of those jobs that looks tricky but is actually quite simple. Whether you need to change a tube, clean dust, or upgrade your lighting, knowing the right steps makes all the difference.
Kitchen lighting matters more than most people think. A bright, clean fixture makes food prep safer and the whole space feel more welcoming. But over time, covers collect dust, yellow, or get grimy. That is exactly when you need to pop that cover off. This guide shows you how to do it safely and quickly, no matter what type of fluorescent light fixture you have above your kitchen.
We will walk you through every single step. You will learn what tools you need, how to handle different cover styles, and what mistakes to avoid. By the end, you will feel confident tackling this job on your own. No electrician required. No complicated jargon. Just clear, practical advice you can use today.
Key Takeaways
- Turn off the power first: Always disconnect electricity before touching any light fixture for safety.
- Identify your cover type: Different covers require different removal methods.
- Use the right tools: A simple screwdriver and step stool are usually all you need.
- Clean regularly: Removing the cover lets you clean dust and grime buildup.
- Avoid common mistakes: Do not force the cover or skip safety steps.
📑 Table of Contents
- Why Removing Your Fluorescent Light Cover Matters
- Tools You Will Need for the Job
- Safety First: Preparing to Remove the Cover
- How to Remove Different Types of Fluorescent Light Covers
- Common Mistakes to Avoid During Removal
- Cleaning and Maintaining Your Fluorescent Light Cover
- Reinstalling the Fluorescent Light Cover
- When to Call a Professional
- Benefits of Regular Light Cover Maintenance
- Final Thoughts
Why Removing Your Fluorescent Light Cover Matters
Some people leave their light covers on for years without thinking twice. But regular removal and cleaning keep your kitchen looking its best. Dust buildup dims the light output, which means you end up using more energy to compensate. A clean kitchen ceiling light also makes the whole room feel fresher and more inviting.
Beyond aesthetics, there are safety reasons too. Dirty covers can trap heat, which shortens the life of your fluorescent tube light. In a busy kitchen where grease and steam float around, grime accumulates fast. Taking the cover off lets you inspect the fixture for any wear or damage. Catching small problems early saves you from bigger headaches later.
When Should You Remove the Cover?
You should remove your light cover removal whenever you notice any of these signs:
- The light looks dimmer than usual even with new bulbs
- You can see a thick layer of dust or grease on the cover
- The cover looks yellowed or discolored
- You need to replace a burned-out tube
- You are planning a kitchen lighting upgrade
Most experts recommend cleaning your fluorescent light fixture every three to six months. Kitchens with lots of cooking activity may need more frequent cleaning. Making this a habit keeps your space bright and safe all year round.
Tools You Will Need for the Job
One of the best things about this task is that you do not need fancy equipment. Most people already have everything at home. Here is a simple list of what you will want before you start.
Essential Tools
- Screwdriver set — both flathead and Phillips head
- Step stool or ladder — make sure it is stable
- Microfiber cloth — for cleaning the cover
- Soft brush — for dusting inside the fixture
- Rubber gloves — protects your hands from sharp edges
Optional but Helpful Items
- A spray bottle with mild cleaning solution
- A flashlight or phone light for better visibility
- A small container to hold screws
- Pliers, in case a clip is stubborn
Having these items ready before you climb up the stool saves time and frustration. You do not want to be halfway through the job and realize you need something from another room. Set yourself up for success by gathering everything first.
Safety First: Preparing to Remove the Cover
Safety is the most important part of any DIY lighting job. Working with kitchen overhead light fixtures means you are dealing with electricity, even when the switch is off. Taking a few extra minutes to prepare properly protects you from injury.
Step-by-Step Safety Prep
- Turn off the light switch on the wall. This cuts power to the fixture.
- Go to your breaker box and switch off the circuit that controls the kitchen lights.
- Test the fixture by flipping the wall switch a couple of times. The light should not come on.
- Let the tubes cool down if they were recently on. Fluorescent tubes can get warm.
- Place your step stool on a flat, stable surface. Never use a chair or a box that might wobble.
Following these steps might feel like overkill, but they really matter. Electrical accidents can happen even with low-voltage fluorescent light ballast systems. Taking the time to be safe means you can enjoy the results without any worry.
Quick Tip: Put a piece of painter’s tape over the breaker switch. This reminds everyone in the house not to turn the power back on while you are working. It is a small step that makes a big difference.
How to Remove Different Types of Fluorescent Light Covers
Not all fluorescent light covers are the same. The method you use depends on the type of cover your fixture has. Let us look at the most common types found in kitchens and how to handle each one.
Type 1: Clip-On Covers
Clip-on covers are the most common type found in residential kitchens. They snap into place using small metal or plastic clips on the sides. To remove one, follow these steps:
- Look closely at the edges of the cover where it meets the fixture housing.
- You will see small clips holding the cover in place.
- Gently push the cover upward or toward the center to release the clips.
- Once the clips are free, carefully lower the cover straight down.
Clip-on covers are usually the easiest to remove. If a clip feels stuck, do not force it. Try wiggling the cover gently from side to side while pushing upward. A little patience goes a long way with light cover removal on clip-style fixtures.
Type 2: Screw-In Covers
Some kitchen fixtures use covers that are held in place by screws. These are common in older kitchens or in fixtures with a more finished look. Here is how to handle them:
- Locate the screws around the edge of the cover.
- Use the correct screwdriver to gently unscrew each one.
- Keep the screws in a small container so they do not get lost.
- Once all screws are out, carefully lift the cover away.
Screw-in covers give you more control during removal. They also tend to be more durable, which makes them a popular choice for kitchen lighting upgrade projects. Just be gentle when unscrewing — over-tightening can strip the threads.
Type 3: Slide-On Panel Covers
Panel-style covers are flat and slide into a track on the fixture. They are common in modern kitchens with drop ceiling designs. Removing them is straightforward:
- Look for a small gap or notch along one edge of the panel.
- Place your fingers in the gap and gently pull the panel toward you.
- The panel should slide out of the track with minimal effort.
- If it feels tight, try wiggling it slightly from side to side as you pull.
Panel covers are great because they do not have clips or screws to deal with. However, they can sometimes be fragile. Handle them carefully to avoid cracking or bending the panel. These are often found in kitchens with a drop ceiling light setup.
Common Mistakes to Avoid During Removal
Even simple jobs can go wrong if you rush or skip steps. Here are the most common mistakes people make when removing a fluorescent light cover in the kitchen — and how to avoid them.
Mistake 1: Not Turning Off the Power
This is the number one mistake. Some people think flipping the wall switch is enough, but it is not. The fixture can still carry a charge. Always go to the breaker box and cut power completely. This single step prevents electrical shock and protects both you and the fixture.
Mistake 2: Forcing a Stuck Cover
If the cover does not come off easily, forcing it will usually make things worse. You might crack the cover, bend the clips, or damage the fixture housing. Instead, stop and figure out what is holding it in place. Check for hidden screws or clips you might have missed. A little extra time spent diagnosing the problem saves you from costly repairs.
Mistake 3: Using the Wrong Tools
Using a screwdriver that does not fit properly can strip screws and scratch the cover. Always use the right size and type of screwdriver. If you are dealing with a screw-in cover and the screwdriver slips, you risk scratching the fixture or injuring your hand.
Mistake 4: Skipping the Cleaning Step
Many people remove the cover, do their task, and put it right back on without cleaning. This defeats the purpose. Dust and grime buildup reduce light output and can even affect how long your fluorescent tube light lasts. Take the extra few minutes to clean both the cover and the fixture housing.
Cleaning and Maintaining Your Fluorescent Light Cover
Once you have the cover off, this is the perfect time to give it a thorough cleaning. A clean cover makes your kitchen look better and improves light quality. Here is how to do it right.
Step-by-Step Cleaning Process
- Wipe the cover with a dry microfiber cloth to remove loose dust.
- If there is grease or grime, spray a mild cleaning solution onto the cloth (not directly on the cover).
- Wipe gently in circular motions to avoid scratching the surface.
- For stubborn spots, let the solution sit for a minute before wiping again.
- Dry the cover completely before reinstalling it.
For plastic covers, avoid using abrasive cleaners or rough sponges. These can scratch the surface and make future dust buildup worse. Glass covers can handle a bit more elbow grease, but always dry them thoroughly to prevent water spots.
How Often Should You Clean?
In a busy kitchen, aim to clean the cover every two to three months. If you do a lot of cooking that produces steam or grease, you might need to clean it monthly. Regular cleaning keeps your kitchen lighting upgrade looking fresh and performing at its best.
Reinstalling the Fluorescent Light Cover
Putting the cover back on is just as important as taking it off. A poorly reinstalled cover can wobble, let dust in, or even fall. Here is how to make sure your fluorescent light fixture looks and works great after reinstallation.
Steps for Proper Reinstallation
- Make sure the cover is completely dry and free of debris.
- Align the cover with the fixture housing carefully.
- For clip-on covers, press gently on all four corners until you hear the clips click into place.
- For screw-in covers, start each screw by hand to avoid cross-threading.
- Tighten screws evenly — do not tighten one fully before the others.
- For panel covers, slide the panel back into the track until it sits flush.
After reinstalling, step back and check that the cover is level and secure. Give it a gentle tug to make sure it is not loose. Once you are satisfied, head back to the breaker box and restore power. Flip the wall switch and enjoy your freshly cleaned kitchen overhead light.
When to Call a Professional
Most light cover removal jobs are straightforward DIY tasks. But there are times when calling in a professional makes sense. If you notice any of the following issues, it is best to get expert help:
- The fixture shows signs of electrical damage or corrosion
- The fluorescent light ballast makes a buzzing or humming noise
- Multiple tubes flicker even after replacement
- The cover is cracked or damaged beyond repair
- You are uncomfortable working at height or with electrical fixtures
A licensed electrician can safely handle complex issues and recommend the best kitchen lighting upgrade options for your space. There is no shame in calling a pro when the job feels beyond your comfort zone. Safety always comes first.
Some homeowners choose to replace their old fluorescent tube light fixtures with modern LED panels during a kitchen remodel. This is a great way to improve energy efficiency and light quality. If you are considering this kind of change, a professional can advise on the best fixtures for your kitchen layout and design.
Benefits of Regular Light Cover Maintenance
Taking a few minutes every few months to remove and clean your fluorescent light cover pays off in many ways. Let us look at the key benefits of making this a regular habit.
- Better light quality: Clean covers let more light pass through, brightening your workspace.
- Energy savings: Brighter light means you may not need to turn on extra lamps.
- Longer fixture life: Regular cleaning prevents heat buildup that can damage components.
- Improved kitchen appearance: A bright, clean kitchen always looks more welcoming.
- Early problem detection: Regular removal lets you spot issues before they become expensive repairs.
Think of it as a small investment of time that returns big dividends. A well-maintained kitchen ceiling light makes every meal prep session easier and more enjoyable. Plus, it keeps your home looking its best without any extra cost.
Final Thoughts
Removing a fluorescent light cover in the kitchen is one of those simple home maintenance tasks that anyone can master. With the right tools, a little safety preparation, and the steps outlined in this guide, you can complete the job in just a few minutes. The key is to take it slow, follow the safety steps, and not be afraid to ask for help if something does not look right.
Whether you are cleaning a dusty cover, replacing a tube, or planning a full kitchen lighting upgrade, knowing how to handle your fluorescent light fixture gives you confidence and saves money. Regular maintenance keeps your kitchen bright, safe, and looking great for years to come.
Now that you know the process, grab your screwdriver and step stool, and give it a try. You will be surprised how easy it really is. Your kitchen — and your wallet — will thank you for it.
Frequently Asked Questions
Can I remove the fluorescent light cover without turning off the power?
No, you should always turn off the power at the breaker box before removing any light cover. Even if the switch is off, the fixture may still carry a charge. Taking this simple safety step protects you from electrical shock and prevents damage to the fixture.
What if my fluorescent light cover is stuck and will not come off?
If the cover is stuck, do not force it. Check for hidden clips or screws you might have missed. Sometimes covers get stuck due to paint or grime buildup. Gently wiggle the cover from side to side while pushing upward. If it still will not budge, a hairdryer on low heat can help loosen any paint seal around the edges.
How often should I clean my kitchen fluorescent light cover?
For most kitchens, cleaning the cover every two to three months is ideal. If you cook frequently or have a lot of grease in the air, you may need to clean it monthly. Regular cleaning keeps the light bright and prevents grime from damaging the cover over time.
Are fluorescent light covers universal, or do they come in different sizes?
Fluorescent light covers come in many different sizes and shapes. The most common sizes for kitchen fixtures are 2 feet and 4 feet for tube-style lights, and various sizes for panel and clip-on covers. Always measure your existing cover before purchasing a replacement to ensure a proper fit.
Can I replace a fluorescent light cover with an LED panel?
Yes, many homeowners upgrade from fluorescent covers to LED panels during a kitchen lighting upgrade. LED panels are more energy-efficient, last longer, and provide brighter, more even light. However, you may need to rewire the fixture or replace the ballast to accommodate LED technology.
Do I need any special tools to remove a fluorescent light cover?
Most of the time, you only need a basic screwdriver and a stable step stool. Clip-on and slide-on covers usually require no tools at all. Screw-in covers need a matching screwdriver. The key is to work carefully and have the right size tool for any screws involved.
=== CONCLUSION ===
Removing a fluorescent light cover in the kitchen is a quick, easy, and satisfying DIY task. You have everything you need to know — from safety prep and tool gathering to cleaning and reinstallation. The process works the same whether you have a clip-on, screw-in, or slide-on cover. Regular maintenance keeps your kitchen ceiling light performing at its best and your space looking bright and clean.
Start with the safety steps, follow the removal method for your specific cover type, and take your time. If you run into any issues, refer back to this guide or consult a professional. With a little practice, you will be able to handle this job in just a few minutes whenever it is time for a cleaning or a kitchen lighting upgrade. Your kitchen deserves the best light possible, and now you know exactly how to make that happen.